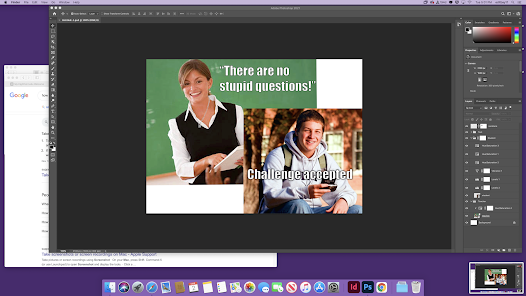
To create the rough draft of my meme are started by placing the image of the teacher. I added adjustments to only this layer but clicking hue/saturation and adjusting that to what I think looks best. I then clicked layer and create clipping mask. Doing so connects only the layer below it with the adjusted hue/saturation. It was helpful to watch the adobe video when doing this to see where exactly these options are. I then added the image of the student and the text on top. To make it easier to read the text I added a glow to it as well as the stroke option so the text is outlined. Lastly I added a necklace to the teacher. To do so I created a new layer mask. This allows you to use the brush tool to remove parts of the image creating transparency. One thing I didn't realize beforehand was how tedious this process would be. Since I chose a necklace with chains there were many gaps that I had to remove with a very tiny brush. Overall it looks good but it was very time consuming.
https://helpx.adobe.com/photoshop/how-to/photoshop-layers-affected.html
https://helpx.adobe.com/photoshop/using/masking-layers.html